The Freezer-Friendly Secret: How to Prep Sweet Potatoes in Bulk for Effortless Weeknights
Unlock Your Freezer's Potential: The Ultimate Guide to Meal Prepping Sweet Potatoes
Hey there, meal prep friend! If you've ever found yourself staring at a bag of sweet potatoes on a busy Wednesday night, willing them to cook themselves, this guide is for you. Sweet potatoes are a nutritional powerhouse—packed with fiber, vitamins, and that delicious natural sweetness—but they can be a bit time-consuming to cook from scratch. The solution? Freezer meal prep! By prepping sweet potatoes in bulk, you're not just saving time; you're creating a versatile, ready-to-go ingredient that can transform into a cozy side, a hearty breakfast, or the star of your favorite grain bowl.
In this practical guide, we'll walk through the best methods to prep, freeze, and reheat sweet potatoes while keeping their texture as close to fresh as possible. We'll focus on bulk prep to maximize your freezer space and minimize weekday effort. Let's dive in—you've got this!
Why Freeze Sweet Potatoes? The Weeknight Game-Changer
Before we get into the how-to, let's talk about why this is such a smart move. Sweet potatoes are a staple in so many recipes, but cooking them from raw every time can feel like a chore. Freezing them pre-cooked means:
Time Savings: On a busy evening, just grab a portion from the freezer, reheat, and go. No more waiting 45 minutes for roasting.
Reduced Waste: Buy in bulk when they're on sale, prep once, and enjoy for months.
Versatility: From breakfast hashes to dinner sides, frozen sweet potatoes are a blank canvas for flavors.
The key to success? Preventing that dreaded mushy texture when thawed. We'll cover methods that keep them firm and flavorful, perfect for your meal prep rotation.
Choosing the Right Sweet Potatoes for Freezing
Not all sweet potatoes are created equal when it comes to freezing. Here's what to look for:
Opt for firm, unblemished ones: Avoid any with soft spots or cracks, as they won't hold up well.
Variety matters: Orange-fleshed (like Beauregard) are sweet and creamy, great for mashes or bowls. White or purple varieties have a starchier texture that freezes beautifully for roasts or fries.
Size: Medium-sized potatoes (about 6-8 inches) are easiest to handle; they cook evenly and portion well.
Pro tip: Stock up during fall harvests for the best flavor and price. Aim for 5-10 pounds for your first bulk batch— that's enough for 4-6 meals per person.
Essential Prep Tools: Keep It Simple
You don't need fancy gear for this. Here's your basic toolkit:
A sharp knife and sturdy cutting board
Baking sheets for roasting or boiling pot
Freezer-safe bags or airtight containers (label them!)
Parchment paper to prevent sticking
A food processor or grater if you're going the mash route (optional but handy)
Safety first: Always wash your sweet potatoes thoroughly to remove dirt, and peel if desired (peeling before freezing can save time, but leaving the skin on adds nutrients and fiber).
Step-by-Step Methods: Choose Your Adventure
There are three main methods for prepping sweet potatoes for the freezer: roasting, boiling/mashing, and raw chopping (with a special twist). Each has its pros for texture and versatility. We'll focus on roasting and boiling/mashing as they're best for preventing degradation, while the raw method works for specific uses like stir-fries. Pick one or mix and match based on your preferences.
Method 1: Roasting (Best for Sides, Bowls, and Breakfast Hash)
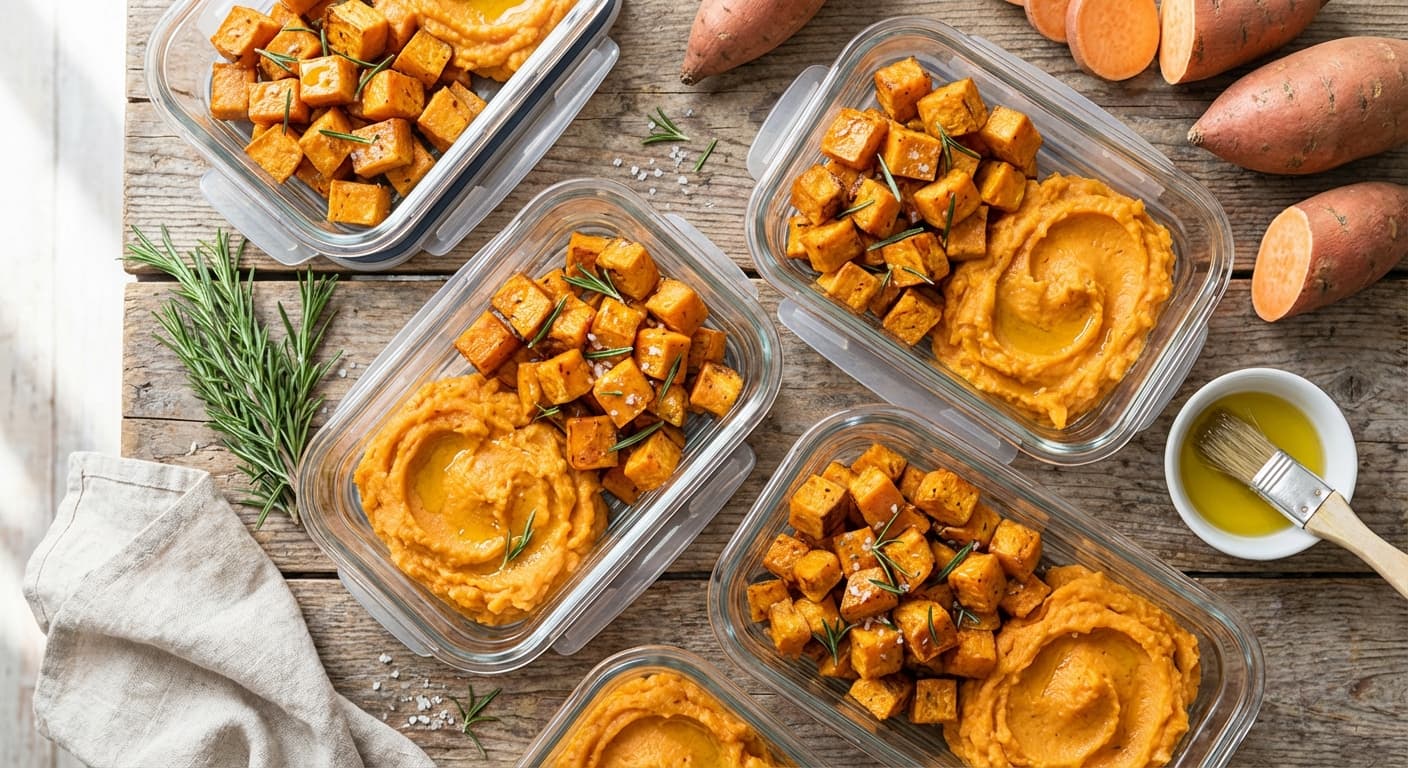
Roasting brings out the natural sugars and keeps the texture firm yet tender—ideal for freezing. This method yields versatile cubes or wedges.
Prep the potatoes: Preheat your oven to 400°F (200°C). Wash and peel (or leave skins on). Cut into 1-inch cubes or 1/2-inch thick wedges. Uniform size ensures even cooking.
Season and roast: Toss cubes with a light coating of olive oil, salt, and pepper (avoid heavy spices now—add them fresh later). Spread in a single layer on a parchment-lined baking sheet. Roast for 25-35 minutes, flipping halfway, until just tender but not mushy. They should hold their shape when pierced with a fork.
Cool completely: Let them cool on the sheet for 10 minutes, then transfer to a wire rack. This step is crucial—hot potatoes create ice crystals, leading to sogginess.
Flash freeze: Spread cooled potatoes on a parchment-lined tray and freeze for 1-2 hours until solid. This prevents clumping.
Package for the freezer: Transfer to freezer bags or airtight containers. Squeeze out excess air (use a straw to suck it out if needed). Label with date and contents. Freeze for up to 10-12 months.
Why this works: Roasting dehydrates the surface slightly, locking in structure. Texture tip: If you're freezing for roasts or bowls, slightly undercook by 5 minutes to account for reheating.
Method 2: Boiling and Mashing (Perfect for Soups, Casseroles, or Quick Sides)
If you love creamy mashed sweet potatoes or want them ready for purees, boiling is your go-to. It's faster than roasting and retains more moisture for mashes.
Prep the potatoes: Peel and cut into 1-2 inch chunks (smaller pieces cook faster).
Boil to tenderness: Place in a pot, cover with cold water, and bring to a boil. Simmer for 15-20 minutes until fork-tender. Drain well—excess water is the enemy of good texture!
Mash (optional): For mashed sweet potatoes, mash with a bit of butter or olive oil (skip dairy if freezing long-term, as it can separate). For cubes, skip mashing and cool as-is.
Cool and flash freeze: Spread on a tray to cool completely, then freeze individually for 1 hour.
Portion and store: Use freezer bags for cubes or containers for mashes. For mashes, portion into 1-cup servings for easy use in recipes. Freeze for 8-10 months.
Texture saver: Boiled potatoes can get watery, so add a splash of lemon juice to the water for acidity, which helps firm them up. This method shines in creamy dishes where slight softness is okay.
Method 3: Raw Chopping (For Stir-Fries or Quick Steams)
For a raw prep (less common but efficient), chop into sticks or cubes, blanch in boiling water for 3-5 minutes to halt enzymes, cool, flash freeze, and store. This works best for recipes where you'll cook them further, like fried rice or steamed sides. Texture degrades more here, so only use if roasting/boiling isn't an option. Limit to 6-8 months frozen.
Reheating: Bringing Back the Freshness
The magic of meal prep shines at reheating. Avoid the microwave for best texture—opt for oven or stovetop:
From frozen (roasted cubes): Preheat oven to 425°F (220°C). Spread on a baking sheet and roast for 10-15 minutes until heated through and edges crisp up.
Mashed: Thaw overnight in the fridge, then reheat in a saucepan over low heat, stirring in a splash of milk or broth to loosen.
Quick steam: For raw-frozen pieces, steam or sauté directly from frozen for 5-7 minutes.
Pro tip: If they seem a bit dry after thawing, a drizzle of olive oil or a pat of butter during reheating revives them beautifully. Never refreeze once thawed—portion wisely!
Versatility Ideas: From Breakfast to Dinner
Now for the fun part—how to use your frozen treasures. They're a meal prep MVP because they pair with almost anything:
Breakfast bowls: Toss roasted cubes with eggs, spinach, and feta for a quick hash. Or blend thawed mashes into oatmeal for natural sweetness.
Lunch/dinner sides: Reheat and season with cinnamon, cumin, or paprika. Serve alongside grilled chicken or toss into chili.
Grain bowls: Add to quinoa, black beans, and avocado for a nutrient-packed bowl. From frozen to table in 10 minutes!
Soups and purees: Thawed mashes are perfect for blending into creamy soups or as a base for veggie burgers.
Mix flavors post-freeze: Add fresh herbs, spices, or a squeeze of lime when reheating to keep things exciting.
Common Pitfalls and Pro Tips
Texture issues? Overcooking before freezing is the culprit—aim for just-tender. Use high heat for roasting to avoid steaming.
Portion smart: Freeze in 1-2 cup servings to match your recipe needs.
Label everything: Include the date and method (e.g., "Roasted Cubes - Oct 2023") to track freshness.
Bulk hack: Prep while watching your favorite show—it's therapeutic!
Safety note: Thaw in the fridge overnight for best results; never at room temp to avoid bacteria.
If you're new to freezer meal prep, start with a small batch to test your preferences. You'll soon wonder how you ever lived without this trick.
Wrapping It Up: Your Freezer, Your Best Friend
There you have it—a foolproof way to prep sweet potatoes in bulk and freeze them without losing that fresh-cooked magic. By choosing the right method (roasting for versatility, boiling for creaminess), cooling properly, and reheating thoughtfully, you'll save hours on weeknights while eating healthier. Imagine pulling a portion from the freezer and turning it into a delicious meal in minutes—that's the power of smart prep.
Give it a try this weekend and see how it transforms your routine. Got questions or your own tips? Drop them in the comments—I'd love to hear how it goes! Happy prepping!